| Before
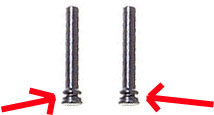
installing take note of the two axis pins. Near
the head of the pin you will see a grove, this grove
is where the Shepard hook (crook) will fit into
to prevent them from walking out of the rifle. |
 |
|
|
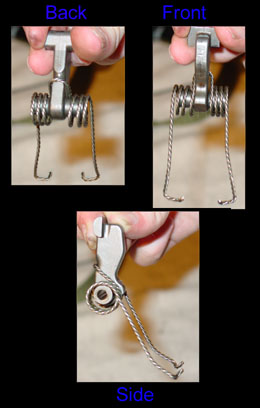
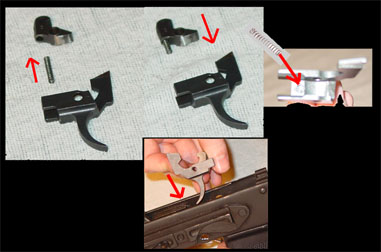
To reinstall,
first wrap the hammer spring around the hammer as
shown in the above picture.
|
|
|
Place
the hammer back in the rifle as shown with the hole
lined up with the hammer axis pinhole on the receiver.
Hold the hammer in place and reinsert the hammer
axis pin, do this with the left side of the rifle
facing up. The fat head part of the axis pin should
keep the pin from falling all the way through the
rifle; make sure the head of the axis pin is on
the left side of the receiver. I recommend you take
a piece of scotch tape and tape the pin in place
until you finish installation.
|
 |
|
Next take the hammer and disconnector and reassemble
them as shown, make sure the disconnector spring
is in the hole inside the disconnector and the
small notch inside the trigger. Reinsert the trigger
and disconnector into the receiver as a single
unit, make sure they do not separate because the
spring inside the disconnector will come out,
and the two holes on the bottom of the trigger
and disconnector will not line up for the trigger
axis pin.
|
|
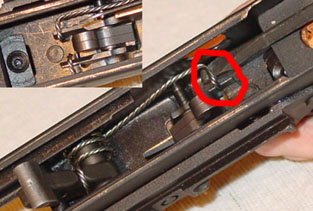
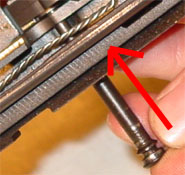
While holding the trigger and disconnector unit
together with the holes on the bottom of the unit
lined up with the trigger axis pin hole, reinsert
the trigger axis pin left to right with the head
of the pin against the left side of the receiver.
Note: (You may have to move the two ends of the
hammer spring out of the way to clear room for
the trigger and disconnector unit, make sure the
two pieces of the spring are above the axis pin)
The pin should pass through both the trigger and
disconnector. With the pin in place I recommend
you take a piece of scotch tape and tape the pin
in place until you finish installation.
|
|
|
|
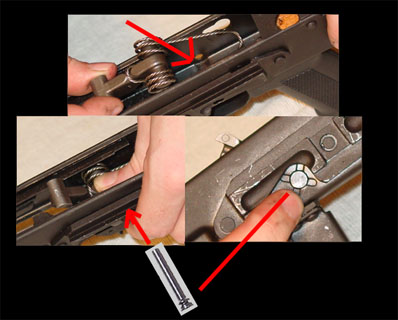
Now
take the two ends of the hammer spring and hook
them around the two rear protruding pieces of the
trigger as shown. |
| To Continue
the Tutoral Click Below for page 4 |
| Go
to Page 4 of Tutorial |